Posts about sustainability

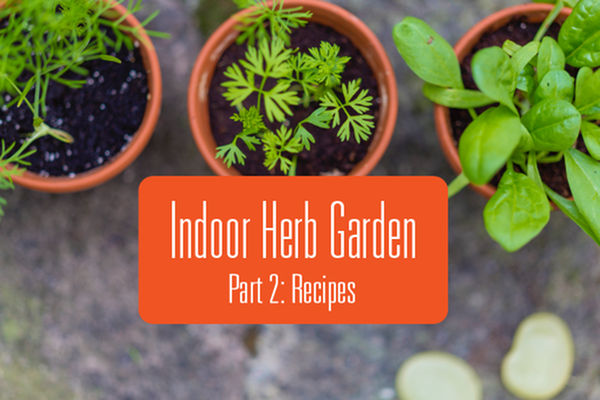
Growing Herbs Indoors Part 2: Recipes-image

Last week our friends at the U of I taught us how to grow herbs indoors. Now they’re back with some tasty recipes to try using those freshly grown herbs!   First of all, check out this blog post from the University of Illinois Extension on seasoning food with fresh herbs. They’ll also teach you some handy herb/vegetable pairings, how to convert recipes calling for dry herbs to fresh herbs, and how to tell if your herbs are old.   Subbing Fresh Herbs for Dried:   According to the U of I Extension, you will typically need 3x the amount of fresh herbs as you do dry. For example, a recipe calling for 1 teaspoon of dried parsley would need 1 tablespoon of fresh parsley.   Now that we know a little more about cooking with fresh herbs, let's try out some recipes! All of these were provided by Maggie Furr, of the University of Illinois’ Metropolitan Food and Environmental Systems program who has been helping us plan our super cool Urban Farming project.   Here are the recipes she’s pulled together for us: Tomato Basil Soup 2 1/4 lbs Roma tomatoes and 1 1/4 lbs Cherry tomatoes 4 1/2 Tbsp olive oil Salt and freshly ground black pepper 8 cloves garlic, peeled and left whole 2 small yellow onions, sliced just under 1/2-inch thick 2 cups (32g) lightly packed fresh basil leaves 4 – 5 cups low-sodium vegetable broth Preheat oven to 425 degrees. Place tomatoes on a rimmed baking sheet and toss with 3 Tbsp olive oil then season with salt and pepper (place Roma halves cut side upright). Place onion slices and garlic on a rimmed half sheet and toss brush with remaining 1 1/2 Tbsp olive oil on all sides, sprinkle with salt and pepper. Place baking sheet with tomatoes and half sheet with onions in the oven side by side and roast onions 30 - 35 minutes until edges are golden, and tomatoes 40 - 45 minutes until golden. Peel away any burnt papery layers of onions if there are any. Pull peels from tomatoes. Pour onions and tomatoes into a large pot. Add 4 cups vegetable broth and the basil. Season with salt and pepper to taste. vegetable broth to thin as desired. Blend soup with an immersion blender or in small batches in a blender (only fill blender half full and remove center insert and cover with a kitchen towel). Serve warm topped with grilled cheese croutons if desired. Oregano Lemon Chicken and Potatoes CHICKEN 1 1/2 lbs chicken breasts, boneless, skinless, cut into 1-inch pieces 1 1/2 tbsp olive or avocado oil 1/4 tsp salt 1/4 tsp pepper POTATOES 1 tbsp olive or avocado oil 1 lb white potatoes, halved 1/2 cup chicken stock 2 1/2 tbsp lemon juice 1 tsp garlic, minced 3/4 tsp salt 1/2 tsp onion powder 1 tsp dried thyme 1 tsp dried parsley 1 tbsp fresh oregano Add 1 1/2 tablespoon oil to a large skillet. Heat on medium high. Once the pan is hot, add your chicken. Salt and pepper. Sauté for 3 to 4 minutes uncovered, flipping occasionally. Chicken should have some browning but should not be cooked through. Remove from skillet and set aside. Add the remaining tablespoon of oil to the skillet. Now add potatoes and saute, stirring occasionally, for 10 minutes or until outside of potatoes are browned. Potatoes shouldn't be cooked through quite yet. Reduce heat to medium. Add chicken back to skillet along with the chicken stock, lemon juice, and minced garlic. Sprinkle with salt, onion powder, dried thyme, and dried parsley. Stir. Cover. Simmer for 5 to 7 minutes or until potatoes and chicken are cooked through. Taste. Add more salt or lemon juice if desired. Stir in fresh oregano and serve. Cream Cheese, Tomato and Chives Omelette 2 eggs 1 tablespoon milk salt and ground black pepper to taste 3 tablespoons cream cheese, softened 2 tablespoons seeded and diced tomato 1 tablespoon chopped fresh chives Whisk eggs, milk, salt, and pepper together in a bowl. Heat a 6-inch nonstick skillet over medium heat; pour egg mixture into the hot skillet, tilting so egg mixture covers the entire bottom of the skillet. Slowly cook egg mixture until set, 5 to 10 minutes. Arrange small dollops of cream cheese onto half the omelet; sprinkle tomato and chives over cream cheese. Fold omelet in half over the fillings. Remove skillet from heat and cover until cream cheese has softened, 2 to 3 minutes. Chimichurri Sauce 1 bunch flat leaf parsley (or cilantro parsley mix) - leaves only 2 tbsp oregano fresh leaves 1 lime - juiced ( or 2 tbsp red wine vinegar) 1/2 cup extra virgin olive oil 4 cloves garlic -grated 1/2 chili pepper - optional 1 pinch red pepper flakes 1 pinch sea salt - to your taste Add the parsley, oregano, olive oil, chili pepper and lime juice or vinegar to the bowl of a food processor or blender. Process until combined and smooth to your liking. (Alternatively use a sharp knife and chop the herbs on a cutting board) Transfer the sauce to a bowl or a jar and stir in the grated garlic and red pepper flakes. Season to your taste with the sea salt and more lime. Store in the refrigerator in a tightly closed jar / container for up to 10 ways or freeze for later use.

Read more
Growing Herbs Indoors over Winter-image

Looking for a way to bring the garden inside this winter? Try your hand at growing herbs indoors! Perfect for adding a little oomph to your meals and some beauty to your space. Our friend, Maggie Furr, of the University of Illinois’ Metropolitan Food and Environmental Systems program(MFST) has put together this handy tutorial to get you started! Maggie has been helping us plan the Urban Farm we are going to build on Healey St. , so we thought she’d be the perfect person to teach us about indoor growing! Supplies Seeds To start you'll need seeds! You can skip ahead to see some herbs that are well suited for indoor life. Container If you are starting the herbs from seeds, then you will need some shallow containers for easier germination. One easy and economical example would be old cardboard egg cartons! Potting Mix You’ll also need some potting mix. There are several types of potting mixes. The two you are most likely to use would be a generic mix, like Miracle Grow, or a cactus mix. Generic potting mix is a good soil mix that holds moisture well, but not all plants/herbs want a lot of moisture. Cactus potting mixes are better for low moisture plants because they are made up of soil, perlite, and peat moss. This mixture of materials increases water drainage and prevents soil from compacting. You can also make your own by mixing a “regular” Miracle Grow with sand, perlite, or peat moss on your own! Labels If you decide to start multiple herbs, then you can have some fun whipping up labels to help you keep track of what’s planted! Starting your Seeds: The Egg Carton Method To begin, fill the egg carton loosely with the necessary potting mix and mist the soil so that it’s moist. Carefully place 1-2 seeds in each dimple of the egg carton and mist again. Cover very lightly with more potting mix and mist one last time. Place the egg carton in a place where it will get around 4 hours of sunlight per day. It should take around 2 weeks for the herbs to germinate. Eight to ten weeks after the seeds have sprouted, they can be transplanted into a bigger container. All of the seedlings for one type of herb can be moved to the same container. A 5-6” wide container will be a perfect new home for your new plant “babies”. What are the easiest Herbs to grow? Lots of herbs can easily be grown inside. For example, basil, chives, mint, oregano, parsley, and thyme are super convenient to grow inside because they are easy to pick. Any herb can be grown inside, but to make things easier for you make sure that the herb(s) you choose will have access to adequate sunlight and are easy to pick. Oregano 6-8 hours of direct sunlight per day Oregano should have 6-8 hours of direct sunlight and be kept around room temperature (72 degrees). Oregano prefers to be in a potting mix that drains well, so a Cactus mix will be perfect for Oregano. Oregano can get root rot very easily so make sure to only water once a week when the soil is completely dry. This herb is ready to be harvested when it reaches 6” in height. When you harvest, make sure you leave 2” at the bottom to ensure continued growth. Basil 6 hours of sunlight per day Basil grows best when it has 6 hours of sunlight and is kept at room temperature. Basil should be potted in either a regular potting mix or a mixture of 50% Cactus potting mix/50% compost. The compost will act as a fertilizer to provide the necessary nutrients for your herbs, but other fertilizers can work as well. Make sure to continually add compost or another fertilizer to the pot to give the basil the nutrients it needs. Keep the soil moist by watering once a week. To keep Basil growing the best, you should pinch the flowers off as they appear. The newer the leaves, the more flavor they will have. Basil can be tricky to harvest, so check out this video to learn the best method. Thyme 6 hours of direct sunlight per day Thyme also likes to have 6 hours of direct sunlight and a temperature around 71 degrees. Thyme prefers to have dry, well-drained soil, so a Cactus mix would be great. Water once a week or when the soil is super dry. Thyme is pretty resilient and if you forget to water it every once-in-awhile, it should be fine. To harvest thyme, wait until it reaches 6” tall and cut the foliage as needed leaving 3” at the bottom. Parsley 4-6 hours of direct sunlight Parsley grows best in 4-6 hours of direct sunlight at room temperature. Any regular “all-purpose” potting mix will work. Make sure to water 1-2 times a week when the top few inches of the soil feels dry. For harvesting purposes, wait until the plant is 6” tall and cut the stems 2” from the base of the parsley. Chives 4-6 hours of direct sunlight Chives, just like Parsley, grow best in 4-6 hours of direct sunlight, at room temperature. Any regular “all-purpose” potting mix will work. Make sure to water 1-2 times a week when the top few inches of the soil feels dry. For harvesting purposes, wait until the plant is 6” tall and cut leaves as you see fit. Make sure to leave 2” at the bottom that you don’t harvest. How to Harvest Herbs When harvesting herbs, you need to be careful to not over harvest. Harvesting too much of the plant at a time can be stressful to the herb and it won’t continue to grow. For the majority of herbs, you want to leave the bottom 2” of the plant unharvested to promote new growth, and keep it from becoming overstressed! Stay Tuned… Once you've got some herbs, try out some of these tasty recipe suggestions! More Resources Growing herbs from seeds can be tricky, so we’ve put together a list of more resources to check out: Growing herbs from seeds U of I Extension: How to grow popular herbs U of I Extension: Try growing culinary herbs This video is also an excellent resource navigating the struggles of starting an herb garden for the first time. Check out the U of I Extension's herb directory for more information on various herbs More sustainable alternatives to peat moss in soil

Read more
Urban Farm Update!-image

Winter weather is quickly approaching and work on our Urban Farm project at 611 W. Healey is on hold until the spring, so we thought now would be the perfect time for a progress update!   In October we hosted a small group of resident volunteers to give us feedback on the direction of the farm so far. We put together these visuals to to give an idea of where the project is heading, and the University of Illinois Extension gave a talk on how to use the new compost bins! (If you would like to learn more about composting check out our blog post). The currently proposed layout includes 9 6’x9’ ground level plots and 4 raised 3’x15’ plots that would probably be split into 8 to accommodate 17 gardeners. The lot would also include a community gathering area, open to all residents, that includes a fire pit, tables and chairs, and a pergola. We also hope to include an outdoor kitchen space.   Residents agreed that this might create a privacy concern for the first floor residents at 609 W. Healey. So we included a vined trellace on the east side of the community area and their windows. Last month, we planted shrubs along the east side of the garden area, as you can see below. We hope to begin construction on this project in the spring. We’re so excited to be able to bring this amenity to our residents. Anyone with feedback or questions (we love to hear them!) can comment on this post below!

Read more
Let's Compost!-image

If you live in our buildings near downtown, you may have seen our shiny new compost bin at 611 W. Healey! We are super excited to be able to offer this new amenity to residents. But what is composting and what do you need to do to participate? What is Composting? Composting is a method of or recycling organic matter (like leaves) and food scraps into a fertilizer that is beneficial for plants. It’s a great way to reduce your households’ impact on the environment by both reducing landfill waste and limiting methane gas!   It sounds complicated, but it is a fairly simple process of layering compostable kitchen scraps and grass clippings (greens) and organic matter such as dead leaves or pine needles (browns).   You can find more in-depth information on composting, provided by the University of Illinois Extension in our blog post, Composting 101. How Can I Compost? Composting is a pretty simple process. Unless you live at 609 W. Healey you probably don’t want to have to run out to the bin every time you generate food scraps. You probably want to invest in a countertop compost bin, which can store a few days worth of scraps at a time without attracting bugs or smelling up your space.   Once you have that you can begin collecting scraps. Not every kitchen scrap is compostable. You’ll want to check out the infographic here to make sure you’re not including anything that won’t decay properly. Things like meat and dairy can cause a smell and attract pests.   Once you’ve got a few days worth of scraps saved up it’s time to take them to the bin! All you need to do is dump them in and make sure you add a layer of browns and greens to make sure everything decomposes properly. We recommend topping your kitchen scraps off with a handful of dead leaves or pine needles that can be found around the property, or even some of your recycling (just be careful that you don’t add anything that is not supposed to be in there.) You can see a list of some common browns and greens below: Browns for the Compost Pile Brown materials for composting include dry or woody plant material. In most cases, these materials are brown, or naturally turn brown: Fall leaves Pine needles Twigs/chipped tree branches/bark Sawdust Paper (newspaper, writing/printing paper, paper plates and napkins, coffee filters) Dryer lint Cotton fabric Corrugated cardboard (without any waxy/slick paper coatings)   Greens for the Compost Pile Green materials for composting consist mostly of wet or recently growing materials. Green materials are usually green or come from plants that were green at some point. But this is not always the case. Grass clippings Coffee grounds/tea bags Vegetable and fruit scraps Trimmings from perennial and annual plants Annual weeds that haven't set seed Eggshells   The Ratio Maintaining a proper ratio for the compost bin is what allows everything to decompose without causing a smell. If the bin begins to smell you should call or email Royse + Brinkmeyer so we can address the problem.   Generally, a ratio of three- or four-parts browns to one-part greens is great, but you do not need to be exact about it.   If we do not get a good mix of brown and green materials, the compost pile may not heat up, may take forever to breakdown, and may start stinking up the place. These issues can usually be remedied easily by tweaking the ratio.   If you find that your compost pile is not heating up, then you may need to add more green material to the compost. If you find that the compost pile is starting to smell, we may need to add more browns. And that’s it! In the end, decomposition happens. It is a natural process. Pile your compostables, turn them (or not), and in time, we will have compost. It really is that simple.

Read more
What is Urban Farming?-image

One of our most exciting projects right now is the creation of an urban farm in the empty lot next to 611 W. Healey St. with help from the University of Illinois’ Metropolitan Food Supply and Environmental Systems(MFST) program within the College of Agricultural, Consumer & Environmental Sciences(ACES) and The U of I Extension . The project is in the early design stages currently, but we thought now might be a good time to explain what an urban farm is and why we’re interested in building one! What Is an Urban Farm? An urban farm is any piece of land gardened by a group of people, using either individual or shared plots on private or public land. Urban farms may be found in neighborhoods, schools, connected to institutions such as hospitals, and on residential housing grounds. The idea is to provide space for farming and gardening in areas where access to those activities may be limited. What Is the Purpose of an Urban Farm? The purpose of an urban farm can vary greatly and is defined by the community members that the garden is meant to serve. The garden may provide a space otherwise unavailable to community members to grow food, flowers, and herbs. It may be used as a way to build or revitalize a sense of community among neighbors or reconnect with nature. Other goals of a community garden can include: educating youth and adults about growing food and associated food system topics (eg. nutrition, health); job and entrepreneurial training in the food sector; improving food access to fresh vegetables and fruits; or therapy gardens. Why Are We Building an Urban Farm? We would like to provide our residents the space, platform, and knowledge to grow their own food, flowers, or herbs at home as well as create a shared community space for people to come together and get to know one another.   We believe that your apartment is more than a temporary rental space – it’s your home. And we want to make living in that home, and being a part of our community, the best experience it can be. We know that one of the major pitfalls of apartment living is the lack of personal outdoor space to garden in, so we’re creating one!   We also want to help our residents feel more a part of our community. We believe this not only enhances your life but the community as a whole! This project allows us to engage residents and get them involved with local organizations like the University of Illinois and the U of I Extension in a unique and personal way.   In addition to all of the great benefits above this project also allows our residents to engage with a more environmentally sustainable lifestyle through composting and rain collection! Why collaborate with the University of Illinois Urbana-Champaign on this project? The University of Illinois Urbana-Champaign College of ACES and the U of I Extension have the knowledge and skills necessary to help plan and implement the garden in as well as provide opportunities for residents to learn more about gardening, composting, and more! We hope to have them doing regular demonstrations and seminars on site once the space is built.   If you want to get a glimpse at this process you can check out the College of ACES webinar series on community gardening , or explore the U of I Extension website for tons of resources on horticulture, energy & environment , and local foods , as well as resources for getting your kids involved!

Read more
What is Composting?-image

  We are building a composting center in the empty lot at 611 W. Healey, so we thought we should share some information about composting. We are newbies to this process, as are many of our residents, so we got some help from the University of Illinois Extension Office . Thanks to Amy DeLorenzo, Extension Educator for providing the information below and Maggie Furr for creating our infographic! What is compost? Compost is organic material (typically food scraps and green waste like grass clippings, leaves, sticks, etc.) that is used as a soil amendment. It can be made from material you already have on hand, especially kitchen scraps. It is an alternative to traditional soil amendments like fertilizer  and is safe to use on both edible and non-edible plants. Why is composting so important? Typically, food and other natural materials that are thrown in garbage cans and landfills get mixed up with other garbage such as plastic, metal, etc. and do not break down effectively. This decomposing material releases methane gas, which is 30x more powerful than carbon dioxide in contributing to climate change. When you compost the material instead you transform it into a valuable resource instead of waste. How do I compost? There are many ways to participate in composting, and some are more suitable than others depending on your living situation: If you live in a small space without access to and outdoor area, you may wish to participate in a compost collection service, in which people pick up food and yard scraps from your home. Inquire at your municipality to see if this is an option. If you live in a small space and have house plants you would like to fertilize with compost a small worm bin or vermicomposting may be right for you. If you have backyard space and wish to build a compost bin or compost pile, there are options for that as well. Soon, If you are a Royse + Brinkmeyer resident who lives near 611 W. Healey you can add your compostable materials to the compost bin there! The bin is currently being built and should be ready for use in early fall. What exactly is “compostable material”? There are lots of commonly used household items that can be composted. For a detailed guide on what can and cannot be composted check out the infographic created by UIUC student, Maggie Furr, below. Further Resources If you are composting in Illinois, a good resource to check out is the Illinois Food Scrap Coalitio n . This website will assist you in finding services, answer frequent questions about compost, and provide a community of support if you wish to know more.

Read more